Graphic Applique Shirts

Graphic applique is a great way to customize your shirt when you want a little more freedom and have a sewing machine handy.  This is probably a project geared towards those with some sewing experience!

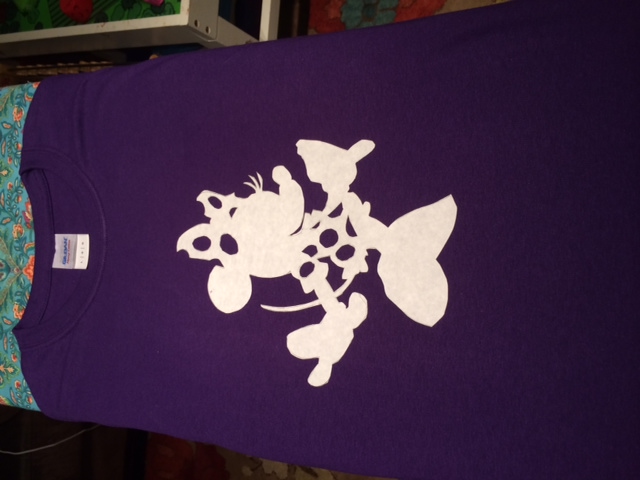
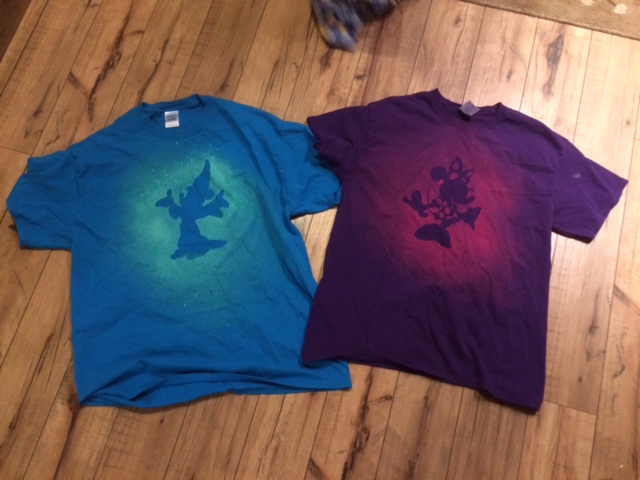
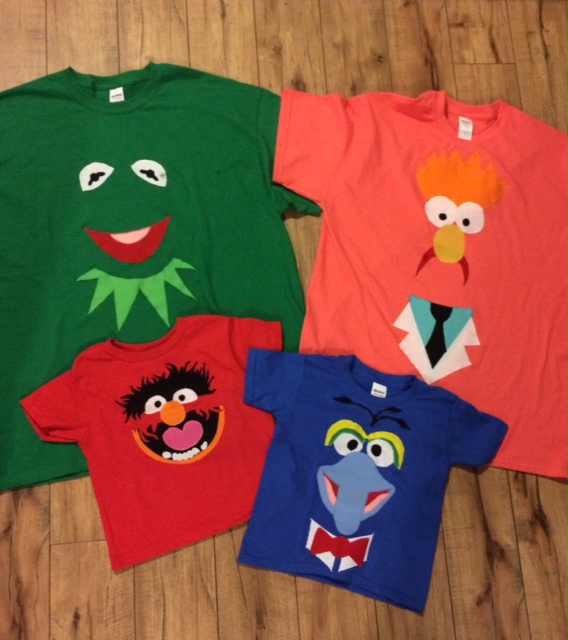
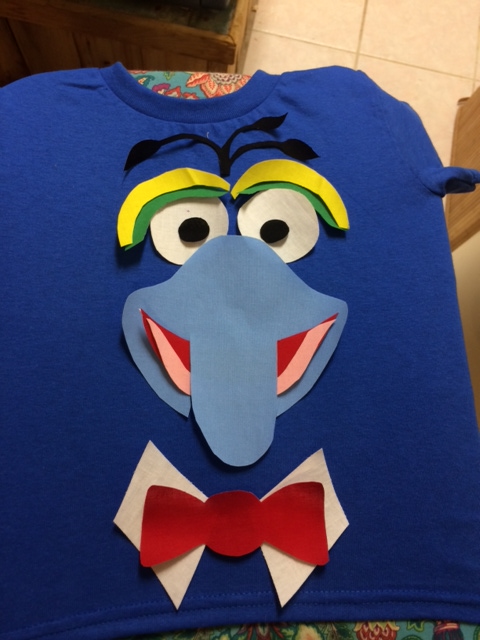
Here is a set of appliqued shirts I made featuring some of my family’s favorite characters:

photo (8)

Material List:

  • fabric assortment
  • base T-shirt
  • double-sided fusible web (like Wonder Under or Heat N’ Bond)
  • Freezer paper
  • pencil and ballpoint
  • good scissors
  • iron and ironing board
  • sewing machine with a zig-zag stitch option
  • thread

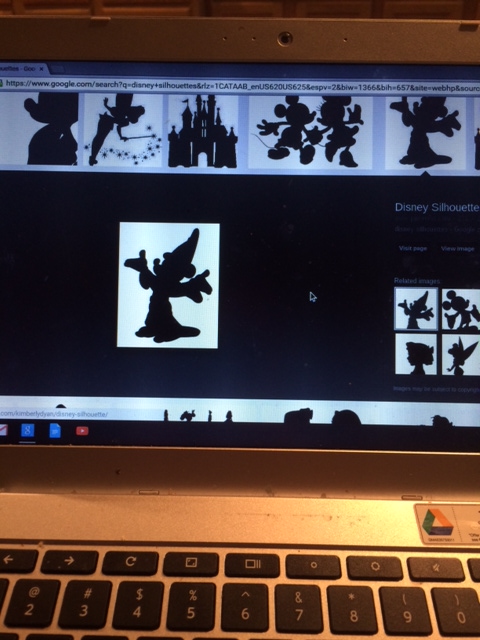
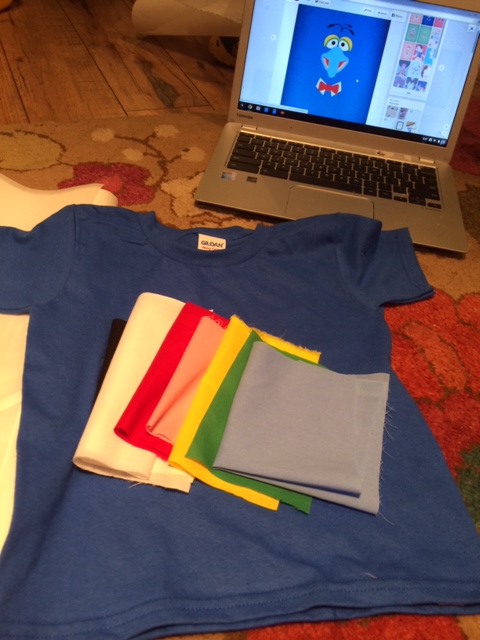
Pick a shirt color that compliments your design.  Get together a palette of fabric.  Here is the shirt I am using (it is a size 4T shirt, for purposes of your scale), and colors matching the image I am working from (seen on the computer monitor).

photo 1 (9)

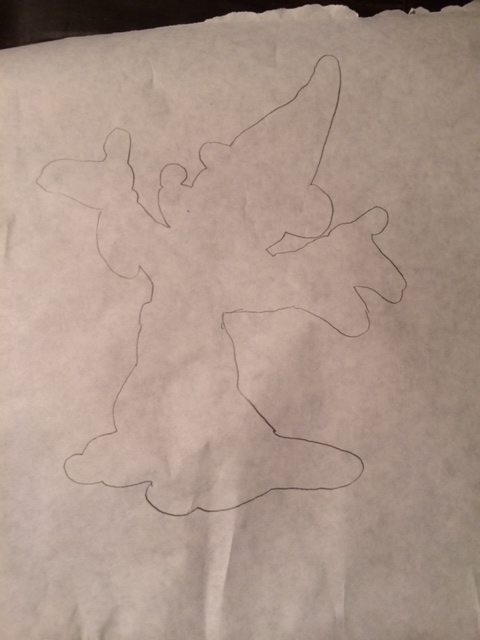
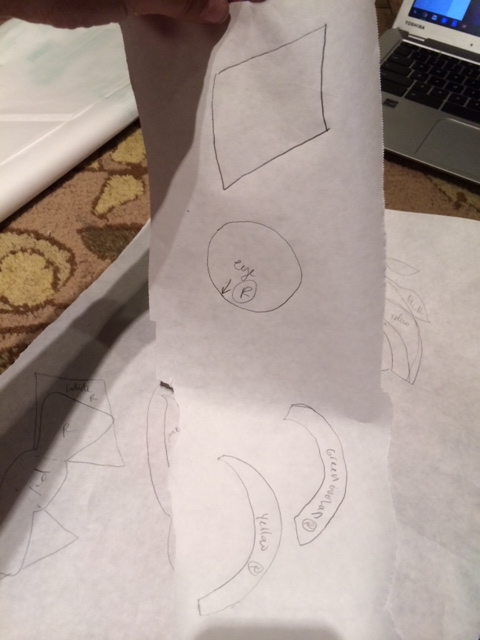
Center a piece of freezer paper over your shirt, and draw out your design.  You can enlarge the image on your computer and trace as well if needed.  Then, label each area by the intended fabric color.

I neglected to photograph this step on my gonzo project, so here is the paper laid out on a T-shirt for my Mad-hatter shirt.

madhatter

There are now two ways to proceed, depending on the complexity of your design and the amount of “mirror images” involved.  If you want to keep you original design/pattern, use additional freezer paper to trace each piece separately.  Having the original design in one place will help you with your layout as well, but once you have more experience with the method you may want to try and cut the pieces from your original drawing.

Here are the shapes traced onto the paper, with my pattern in the background:

photo 2 (8)

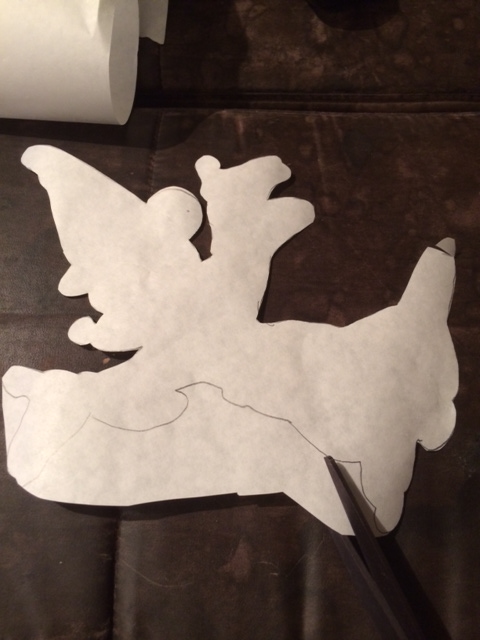
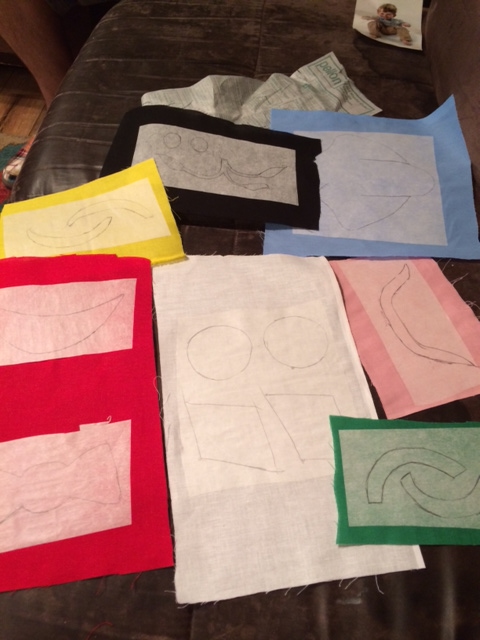
Carefully cut out the components of your pattern and separate into groups by color.

Here are all the pieces laid out:

photo 3 (6)

Now, fuse one side of your web (according to package directions) to the wrong side of the fabrics needed.

photo 4 (5)

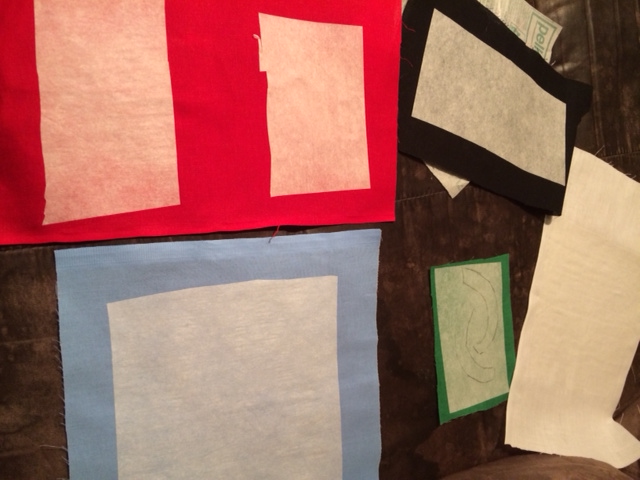
You now can either trace the reverse image onto the paper backing of the fusible web, or iron the freezer paper directly on the correct side.  For Gonzo I traced.  For all my other shirts I found it was easier to just apply the freezer paper to the right side, then remove after cutting around the pattern.

Here are my fabric pieces with the pattern pieces traced out, in reverse, on the paper side of the fusible web:

photo 5 (2)

Here are my fabric pieces all cut out:

photo 1 (10)

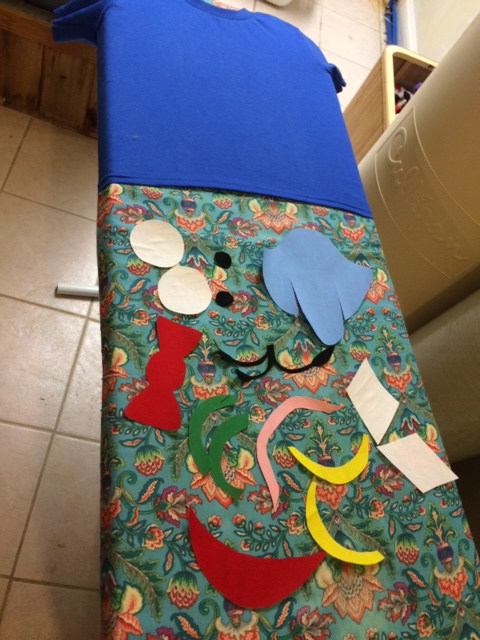
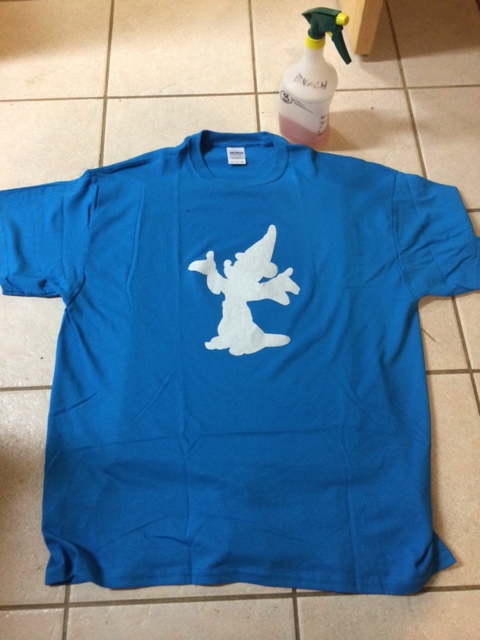
The reverse side paper needs to be removed, creating your fusible applique pieces.  Carefully arrange your pieces onto your T-shirt into your graphic image.  I started by laying them out:

photo 2 (9)

Iron them down, and you are almost there!

photo 1 (11)

The next step is a bit more tedious, sewing the bonded pieces into place.  I try to match my thread to the fabric for each piece, and when two pieces are touching, pick the color I want to dominate/shadow.  If you are making multiple shirts, it will save you a lot of time to do one color at a time on all your shirts, rather than sewing one shirt at a time.

Feel free to ask questions!

Advertisement

Spray Bleach Shirts

This method of creating your own T-shirts is fast and satisfying!  Make your own shirt featuring a hard-to-find character or symbol!  Coordinate for the family by shirt color, or make each piece unique.

Please note that all shirts do not bleach the same.  Some colors will lighten dramatically while others will be more subtle, depending on the color and brand of shirt you start with.  I have had the best luck with blue, purple and green shirts.  Lighter colors like pink or baby blue do not seem to turn out as well.  I also havent had much luck with red (yet).

Here is a shirt I made for myself featuring Mary Poppins:

photo 2

Here is my creation for my husband:

photo 1

And finally, here is my son in his Tarzan shirt:

1472058_10153184438839906_1120108400996638607_n


Materials Needed:

  • Solid color shirts in various sizes
  • plain bleach
  • empty spray bottle with a nice mist (not just a jet stream!)
  • freezer paper
  • Scissors
  • X-acto knife for more intricate designs
  • pencil
  • Iron
  • Cardboard like a shirt box

Start by finding or drawing a picture you want to use.  You can get an idea on some silhouettes that may work well by googling the word “silhouette” with the character you want to you.  Some will be easier to identify than others.  For this sample project, let’s use a sorcerer Mickey silhouette.  Here’s a picture on google images.

photo 1 (6)

Cut a piece of freezer paper larger than you want your design to be.  You can then enlarge the picture on your computer screen (zoom is often ctrl-+).  I then trace the image right from my computer screen onto the freezer paper, which makes a nice little light box!

photo 2 (5)

Now I have my picture drawn on the freezer paper like so:

photo 3 (3)

Carefully cut around your design, keeping in mind everything that is freezer paper will be dark, and all cut outs will be bleached.  For your first design I would use one that is outlined on a single piece of paper, though once you have experience with the process you will see how separate pieces of freezer paper can provide more depth if desired.

photo 4 (2)

Iron the freezer paper directly onto the shirt where you want it to be.  Use a hot iron but be careful not burn anything, I usually go about the “wool” setting.  Make sure all your edges are secured down, especially corners and tiny pieces.

photo 1 (7)

Now, place a piece of cardboard about the size of the shirt in between the layers, to prevent the bleach from penetrating the back.

photo 2 (6)

Mix bleach and water about 1/2 and 1/2 in your spray bottle.  Prime the sprayer and test that you are getting a nice mist instead of a jet stream.  Now, gently mist the area around your freezer paper.  You do not have to saturate it.  It is easy to add more bleach but impossible to take it away!  You will likely see the color begin to change in a minute or so, so you can add more bleach as needed.  I tend to spray a few times right around the freezer paper from a shorter distance, then back up to about 12″ or so and do a lighter mist over the front of the shirt.  You can watch the color dissolve instantly, which will help guide when you are ready to rinse.

30 seconds after spraying:

photo 3 (4)

Two minutes after spraying:

photo 4 (3)

More stubborn colors may need a bit more time, but generally within 5 min you will be ready to rinse.  Using very cold water, rinse the shirt completely.

photo 5

Gently remove the freezer paper as you are doing this.  While the shirt is wet the color differential will not be as great.  Keep rinsing until the bleach is gone.  You can now hang to dry or machine dry.

Soaking wet:

photo 1 (8)

Because I am a fan of matching shirts, I decided to repeat with a bit more complicated silhouette, Minnie Mouse!  You can see the cut outs.

photo 2 (7)

Here are the finished shirts, washed and dried:

photo 5 (1)

Hope you enjoy!

Tie-Dye Mickey T-shirts

Tie-Dye is striking and adaptable, making it a great way to personalize shirts for your family!  I have made several sets of Tie-Dye shirts featuring a central Mickey head with a spiral design surround.  Here’s a sneak peak one of my finished projects:

tiedyemickey1

MATERIAL LIST:

  • 100% cotton white T-shirts for each family member
  • one container of WAXED white dental floss (get unflavored)
  • Soda Ash
  • Sewing needle with eye large enough for the floss
  • Cardboard
  • Pencil
  • Scissors
  • Fabric dye or tie-dye kit in your desired colors
  • A bucket or pail for soaking
  • Plastic wrap
  • Plastic grocery bags, at least two per shirt
  • Good quality rubber bands (don’t use the ones from your tie-dye kit)
  • rubber gloves

Draw out your Mickey Head on a piece of cardboard.  I use a larger tracing for the adult shirts and a reduced size for the kid shirts.  If you don’t feel confident in your free-hand abilities, find a nice Mickey Head image on your computer monitor (use a google image search), and then trace the picture with some lightweight paper right from the screen.  Freezer paper works nicely for this if you don’t have tracing paper at home.  Then cut out the head, and transfer the image to the cardboard.  Cut out the cardboard head, which can be reused over and over.

photo 1 (1)

Center your cardboard Mickey on the T-shirt, and then trace around it with a pencil.  Make sure the lines are dark enough to see, they will not be visable after the process is complete.

photo 2 (1)

photo 3

Cut a length of dental floss, a yard or so long.  Thread it through your needle.  Starting anywhere you wish on the Mickey head, sew around your pencil line using small running stitches.  I do not knot the end, but rather leave a tail a foot or so long hanging out the end.  After the head is all basted, you are going to pull the ends of the floss to gather all the stitches up.  I typically do this as I go along sewing, every few inches, rather than at the end.  You will want the gather to be relatively tight, but be careful not to break your floss.

Starting stitches:

photo 4


All gathered up:

photo 1 (2)

Looks pretty funny right?  Now, take your nice thick rubber bands and loop them tightly around the base of the Mickey Head, directly under your basting stitches.  You should be close to the dental floss, but not covering it up.  I usually use about 4 medium bands for an adult shirt, and 3 for a small one.  Nice and tight, so no white is showing for about an inch thickness under Mickey.

photo 2 (2)

If you are making multiple shirts, repeat the above steps until they are all ready.  Now, you are going to soak the shirts in Soda Ash.  Fill your bucket with water, enough to cover the shirts completely, adding soda ash– about 1 cup to a gallon of water should do the trick.  I let my shirts soak for a couple of hours.  If you are in a rush I don’t think they need to soak that long, but at least 20 min.

Squeeze out some of the excess water, you may want to don your gloves at this point because the water will be very basic and can irritate sensitive skin.  Then, lay the shirt on a hard surface with the banded Mickey facing upwards and positioned in the center of the shirt.

photo 1 (3)

Now, using the Mickey head as your center, twist the shirt in the direction you want your spiral to run, until the entire shirt is all squished up.  Just tuck in those sleeves!

photo 1 (4)

Use some thinner, longer rubber bands to hold the gathered disk together, but not too tight.  I usually use 4 bands so I have nice divided sections to help guide my color placement.  The mickey head will be sticking straight out of the center of your disk.

photo 2 (4)

Now, mix up your colors according to the directions on the bottle.  This part can be messy so protect your space!  First, pick the color that you want to dye your Mickey head.  Hold the disk upside-down and apply the color to the Mickey head starting about where your basting stitches are.  Make sure all the white is covered but don’t use too much, so it doesn’t bleed onto the main part of the shirt.  At this point, you can wrap the Mickey head separately with some plastic wrap to keep the color from bleeding, using a rubber band placed over your other bands.  If you are using a color that will be on your shirt anyway I don’t think this step is necessary, but if you are using black for your head you may want to use this extra protection.

photo 3 (2)

Now, depending on the number of colors you are using, dye the rest of the shirt in sections.  If you are using two colors, separate them quadrants instead of halves for a tighter spiral.  More than two, be creative!  Just try and put colors next to each other than mix well.  For example, if you are using orange, yellow, and blue try to place the yellow between the other two colors so the orange and blue do not mix.  You may get a little green or light orange this way, but at least you will not have any mud puddles!  Similarly red and green should not be next to each other.  For this example shirt I am making a blue, yellow, and green spiral with a green Mickey Head.

photo 4 (1)

Now, place your wet, dripping shirt into a plastic bag and wrap it up, then double bag it.  You are going to let this sit for at least several hours.

Here comes some magic!  Take out your shirt over a sink of running cold water, and unwrap the bands holding the disk together, as you start rinsing out the excess dye.  Rinse out the excess dye, then carefully clip off the bands that are separating your Mickey Head.  Rinse, rinse, rinse!

photo 1 (5)

Pull out your floss basting, or cut carefully if necessary.  Squeeze out the excess water, and admire your wet but finished product!

photo (6)

You are going to want to machine wash on cold with a little detergent to get out the rest of the excess dye, all by itself so you don’t inadvertently dye your other clothes!  I use a few old towels to protect my space, and throw those in with my new shirts.

Enjoy!

Welcome!

Welcome to my blog!  I will be providing step-by-step instructions for projects designed to bring a little extra pixie dust to your Walt Disney World vacation!  Upcoming posts will include Tie-Dye Mickey shirts, costumes, spray bleach shirts featuring your favorite characters, Magic Band decorations, and more!

princessjasmine